By Mary C.
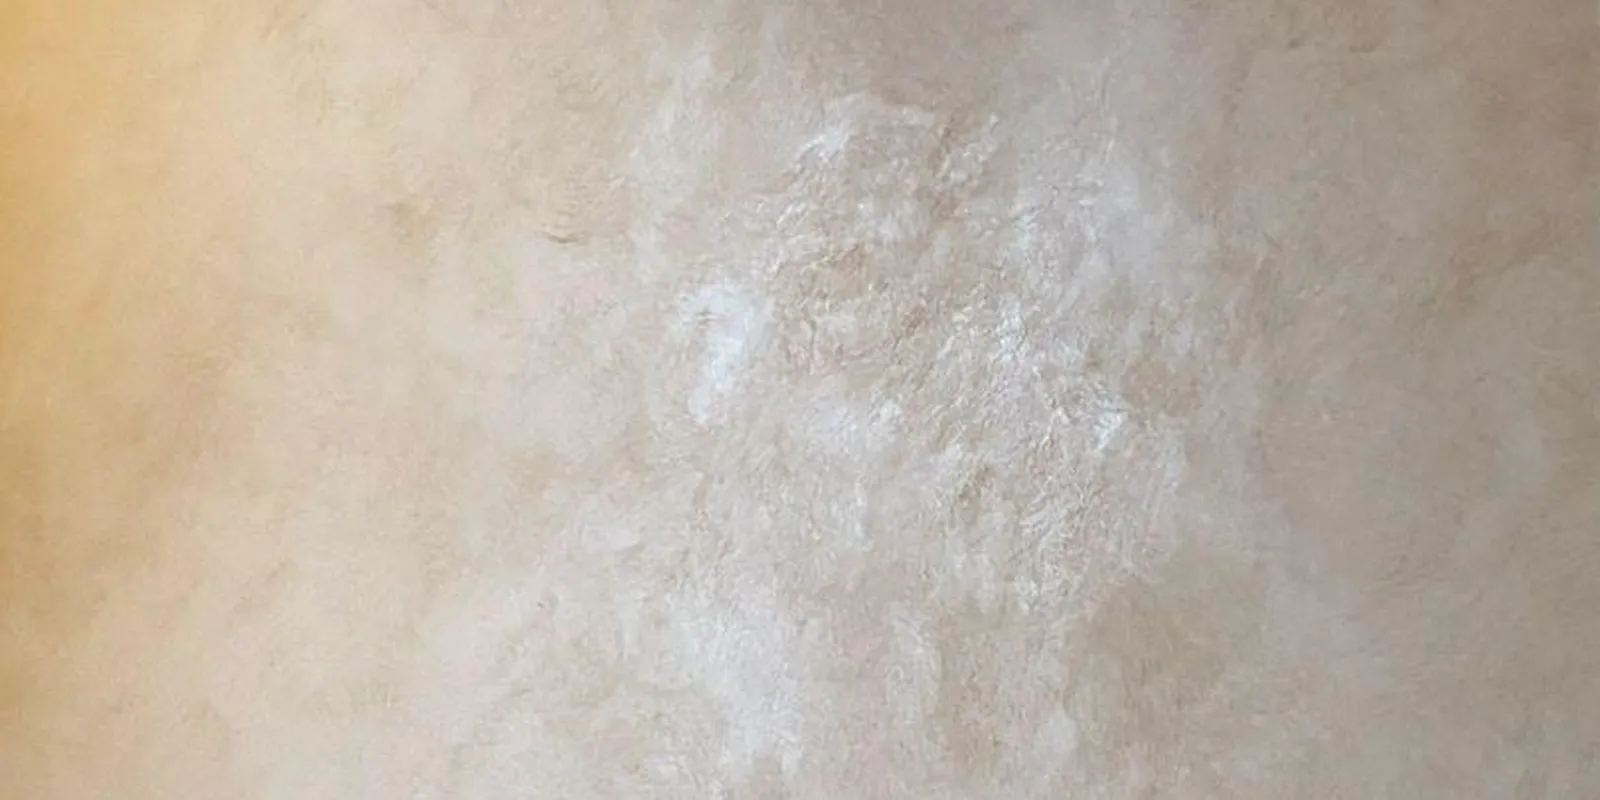
To limewash interior walls, apply a specialized acrylic or potassium silicate mineral primer over clean drywall, allow it to dry completely, apply the first coat of diluted limewash paint in broad "X" cross-hatch strokes using a long-bristle masonry brush, and apply a second coat after 24 hours to build multi-dimensional texture. Limewash is an authentic, mineral-based finish made from slaked lime and natural pigments that bonds chemically to porous substrates. Applying limewash over standard latex paint without a dedicated mineral primer causes the paint to bead up, dry unevenly, and flake off.
Quick Reference Summary for Limewashing Interior Walls
Creating a chalky, textured limewash finish transforms flat interior walls into rich, old-world surfaces with soft visual depth. Achieving proper color movement requires specific brushing techniques, controlled dilution ratios, and appropriate substrate preparation.
Regional atmospheric conditions, home heating systems, and wall construction materials determine how limewash paint cures across different environments. In humid Southern coastal regions, elevated indoor humidity slows down water evaporation, allowing longer working open times for blending brush strokes smoothly across large living room walls. In high-altitude Western mountain residences with low relative humidity, rapid surface drying causes limewash paint to set up quickly, requiring applicators to mist walls lightly with clean water to prevent dark lap marks. In historic Northern properties featuring plaster wall transitions, structural movement requires breathable mineral coatings that flex without trapping moisture inside interior masonry. Below is a complete technical guide detailing how to limewash interior walls correctly.
- Substrate Preparation Rule: Apply a dedicated mineral primer or high-adhesion acrylic bonding primer over existing latex paint or raw drywall before applying limewash.
- Application Tool: Use a 5-inch or 6-inch block brush with natural or stiff synthetic bristles; never apply limewash with a standard paint roller.
- Stroke Technique: Apply paint in sweeping, overlapping "X" or cross-hatch patterns to create organic texture and color variations.
- Curing Timeline: Limewash dries lighter than its wet appearance; allow 24 hours between coats for full carbonation and true color development.
What Is the Difference Between Limewash Paint and Standard Latex Paint?
Understanding the chemistry of limewash explains why application rules differ radically from standard interior wall paints. Technical standards published by the Paint and Decorating Contractors of America (PDCA / PCA) categorize limewash as a breathable mineral coating rather than a film-forming synthetic latex.
Standard latex paint forms a plastic-like acrylic film over drywall. Limewash paint is created by slaking crushed limestone in water, forming calcium hydroxide. When applied to a porous wall, the wet lime absorbs carbon dioxide from the surrounding room air.
This chemical process, known as carbonation, turns the liquid lime back into solid calcium carbonate (limestone) directly inside the wall surface. Because limewash cures as a breathable mineral layer, it allows water vapor to pass through without blistering.
If you are inspecting leftover paint cans in your workshop to see if an old batch of wall primer is usable, read our guide on can you use old paint to verify material consistency.
“Pro Tip 1: Potassium Silicate Mineral Primer Chemical Cross-Linking. Applying limewash directly over standard acrylic latex paint leads to poor mechanical adhesion because latex is non-porous and flexible. Coat existing painted drywall with a high-solids mineral primer containing potassium silicate or quartz aggregate. The quartz particles create a microscopic, sandpaper-like tooth across the wall. This tooth allows the slaked lime particles to anchor mechanically and begin carbonation, preventing the wet limewash from sliding off smooth drywall.”
What Tools Are Needed to Limewash Interior Walls?
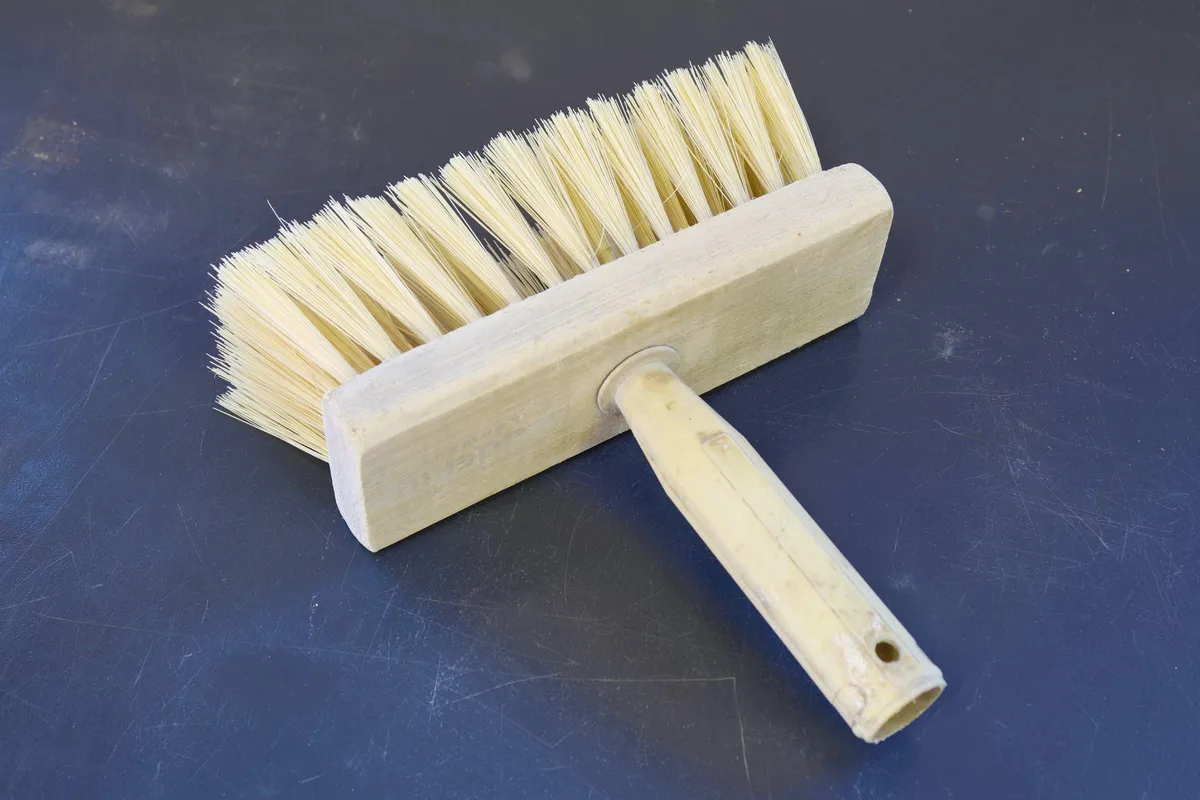
Gathering proper application brushes, mineral primers, mixing buckets, and protective drop cloths ensures a smooth, controlled finish.
1. Application and Mixing Tools
- 5-Inch or 6-Inch Block Masonry Brush: Features long, thick bristles that hold liquid limewash and create wide, sweeping cross-hatch marks.
- Mixing Paddle and 5-Gallon Bucket: Keeps mineral pigments suspended continuously throughout application.
- Spray Bottle with Distilled Water: Mists wall sections in low-humidity environments to extend paint open time.
- Low-Tack Painter's Tape and Heavy Canvas Drops: Protects flooring, baseboards, and ceiling lines from watery lime splatters.
2. Primers and Sealing Products
- Quartz-Aggregate Mineral Primer: Establishes a porous bonding surface over smooth latex or drywall.
- Natural Mineral Pigment Limewash Paint: High-pH slaked lime base blended with inorganic earth pigments.
- Matte Wall Sealer or Olive Oil Soap: Seals high-touch areas like powder rooms or hallways against water spots without adding gloss.
If you are exploring monochromatic color concepts or combining wall textures with matching trim shades, check out our design feature on what is color drenching for palette ideas. For exterior stone or masonry care along patio transitions, review our guide on can you clean limewashed brick for maintenance rules. Learn more about our national brand standards via That 1 Painter.
“Pro Tip 2: Clouding Dynamics via Wet-Edge Maintenance. The signature "clouding" effect of limewash occurs because thicker brush passes absorb carbon dioxide at different rates than thin passes. To maintain natural clouding without creating harsh vertical seam lines, work in small 3-foot by 3-foot sections, keeping a wet edge continuously across the entire wall from corner to corner. Never stop in the middle of a wall expanse. If you must pause, stop at a natural corner line or doorway to prevent dark overlap bands.”
Technical Comparison of Interior Wall Finishes
This technical reference table breaks down coating chemistries, drying times, sheen levels, and breathability ratings across popular interior finishes.
- Authentic Limewash: slaked lime / mineral base; 24 hours per coat to dry and carbonate; ultra-flat / matte sheen; maximum vapor permeability (100% breathable); ideal for feature walls, bedrooms, and living rooms.
- Standard Latex Flat: synthetic acrylic base; 2 to 4 hours to dry; flat sheen (0-3 units); low to moderate vapor permeability; ideal for ceilings and low-traffic areas.
- Satin Latex Enamel: acrylic polymer base; 4 hours to dry; low luster sheen (25-35 units); low vapor permeability; ideal for hallways, kitchens, and bathrooms.
- Roman Clay / Plaster: gypsum / marble dust base; 12 to 24 hours to dry; velvet matte sheen; moderate vapor permeability; ideal for high-end interior wall plastering.
If you are refinishing baseboards, doors, or cabinetry adjacent to your limewashed walls, review our step-by-step guide on painting cabinets with doors for smooth surface preparation.
“Pro Tip 3: Olive Oil Soap Carbonation Curing Sealing. Standard acrylic varnish sealers can turn flat limewash glossy and yellow, ruining its chalky texture. To protect high-contact limewashed walls in hallways or dining rooms while preserving a dead-matte finish, apply a coat of natural black olive oil soap (Savon de Marseille) diluted in warm water. The fatty acids in the soap react chemically with the free lime, forming a water-repellent calcium stearate wax layer that resists water spots while keeping the flat appearance.”
Step-by-Step Guide on How to Limewash Interior Walls
Follow this professional application process to ensure smooth brush execution and beautiful texture movement:
- Inspect and Repair Substrates: Fill nail holes, gouges, and drywall cracks using lightweight joint compound. Sand repairs smooth with 150-grit sandpaper.
- Apply Quartz Mineral Primer: Roll one full coat of quartz-aggregate mineral primer over the entire wall area. Allow the primer to dry for at least 8 to 12 hours.
- Dilute and Stir Limewash Paint: Stir the limewash thoroughly to distribute settled mineral pigments. Dilute the first coat with 15 to 20 percent clean water according to manufacturer guidelines to create a workable, fluid consistency.
- Apply First Coat in "X" Strokes: Dip a 5-inch block brush into the paint. Apply the limewash in broad, overlapping "X" cross-hatch strokes, keeping the application feathered and random. Maintain a wet edge across the entire wall plane.
- Allow 24 Hours for Carbonation: Let the first coat dry for a full 24 hours. The paint will appear dark when wet but will dry significantly lighter as carbonation occurs.
- Apply Second Coat for Color Movement: Apply a second, less-diluted coat of limewash using the same cross-hatch technique. Focus on building soft variations in brush density to enhance the textured, cloudy appearance.
- Apply Protective Sealer (Optional): In high-traffic zones, apply a coat of mineral-compatible matte sealer or diluted olive oil soap after 48 hours.
If major drywall water damage, tape seam cracks, or structural plaster failures require repair before limewashing, utilize our expert drywall repair services. Combine surface restoration with our full interior house painting services or exterior house painting services for long-lasting property protection.
Environmental guidelines established by the U.S. Environmental Protection Agency (EPA) promote zero-VOC, mineral-based coatings like limewash to improve indoor air quality and eliminate chemical off-gassing in residential living spaces.
What Are the Most Common Limewashing Mistakes to Avoid?
Avoiding these common DIY execution errors ensures your limewash project results in a durable, beautiful finish:
- Applying Limewash Over Standard Primer: Applying limewash over smooth, non-porous latex primer prevents proper adhesion, causing the paint to flake off when dry.
- Using a Standard Paint Roller: Rolling limewash produces an uneven, stippled texture that destroys the soft, brushed clouding effect.
- Stopping Mid-Wall During Application: Pausing halfway across a wall allows the edge to dry, creating a dark vertical lap line that cannot be feathered out.
- Judging Color While Wet: Limewash dries up to 40 percent lighter than its wet state; judging color depth before full carbonation leads to over-applying paint.
Answers to Common Questions About Limewashing Interior Walls
Can you limewash directly over painted drywall?
You can limewash over previously painted drywall, but you must apply a specialized mineral primer or quartz-aggregate bonding primer first. Limewash cannot adhere directly to slick latex or oil-based paint.
Is limewash paint wipeable and easy to clean?
Unsealed limewash is porous and can absorb water drops or oils. For light cleaning, wipe gently with a dry microfiber cloth. In high-traffic areas, apply a mineral-compatible matte sealer to make the surface wipeable with a damp sponge.
How many coats of limewash are required?
Limewashing generally requires two coats. The first coat establishes the mineral bond and base color, while the second coat builds visual depth, clouding movement, and chalky texture.
Does limewash dry darker or lighter?
Limewash dries significantly lighter than its wet appearance. As the wet calcium hydroxide reacts with carbon dioxide in the room, it cures into white calcium carbonate crystals, lightening the finish by several shades.
Is limewash safe for indoor air quality?
Yes, authentic limewash is one of the safest interior paints available. It is zero-VOC, odorless, non-toxic, naturally hypoallergenic, and resistant to mold and mildew due to its high alkaline pH level.
Workplace safety standards enforced by the Occupational Safety and Health Administration (OSHA) require proper eye protection and gloves when handling high-pH lime materials to prevent skin and eye irritation.
Ready for Professional Interior Preparation and Home Painting Services?
Selecting proper mineral primers, managing brush stroke clouding, sealing high-traffic areas, and applying factory-smooth interior finishes require technical skill and professional execution. Let our experienced painting teams handle your wall transformations safely and efficiently.
Note: Pricing estimates are based on 2026 regional averages. Every home is unique, and final quotes require an on-site assessment to account for material costs, prep work, and structural conditions.
Contact That 1 Painter today to schedule your detailed, obligation-free on-site estimate and give your property a crisp, durable finish. Book Your Free Professional Estimate Now
