
By Mary C.
To use a paint sprayer successfully, you must strain your paint through a mesh filter, prime the fluid pump, select the correct spray tip size, adjust the fluid pressure until fingers or tailing lines disappear, and hold the spray gun 10 to 12 inches from the wall while maintaining a 50 percent pattern overlap. Operating an airless or High Volume Low Pressure (HVLP) paint sprayer requires consistent arm speed and perpendicular gun movement to avoid sags, heavy edges, and uneven film thickness. Following proper fluid pressure calibration and thorough post-spray solvent flushing ensures a factory-smooth finish across exterior siding, interior trim, and drywall surfaces.
Quick Reference Summary for Operating a Paint Sprayer
Mastering a professional paint sprayer transforms large residential painting projects by dramatically reducing application time compared to manual brushing and rolling. However, achieving a flawless finish without heavy overspray or equipment clogs demands technical discipline during setup, spraying, and cleanup phases.
Regional climate conditions, atmospheric humidity, and local housing construction materials heavily influence how spray-applied coatings dry across different geographic areas. In humid Southern coastal regions, high ambient moisture retards water evaporation in sprayed latex paints, requiring lower fluid pressure adjustments to prevent sagging along vertical siding joints. In high-altitude Western mountain residences with low relative humidity, rapid surface drying causes sprayed acrylics to flash-dry mid-air, making Fine Finish Low Pressure (FFLP) tips necessary to maintain a wet edge. In historic Northern properties subject to freeze-thaw cycles, painting weathered cedar siding or plaster walls with an airless sprayer requires precise back-rolling to force the atomized paint deep into open wood pores.
- Primary Preparation Rule: Always strain paint through a 50-mesh filter bag before pouring it into the intake bucket to eliminate debris that clogs spray tips.
- Distance and Angle Standard: Hold the spray gun perpendicular to the wall surface exactly 10 to 12 inches away; never wrist-fan or tilt the gun at an angle.
- Overlap Protocol: Maintain a strict 50 percent pattern overlap on every pass, flexing your arm steadily across continuous wall sections.
- Pressure Calibration Rule: Start spraying at the lowest pressure setting and gradually increase control until the fan pattern shows atomized edges without dark outer tails.
What Is the Difference Between Airless and HVLP Paint Sprayers?
Selecting the correct spraying equipment depends on substrate size, material viscosity, and required finish quality. Technical application standards published by the Paint and Decorating Contractors of America (PDCA / PCA) categorize sprayers by their atomization mechanics.
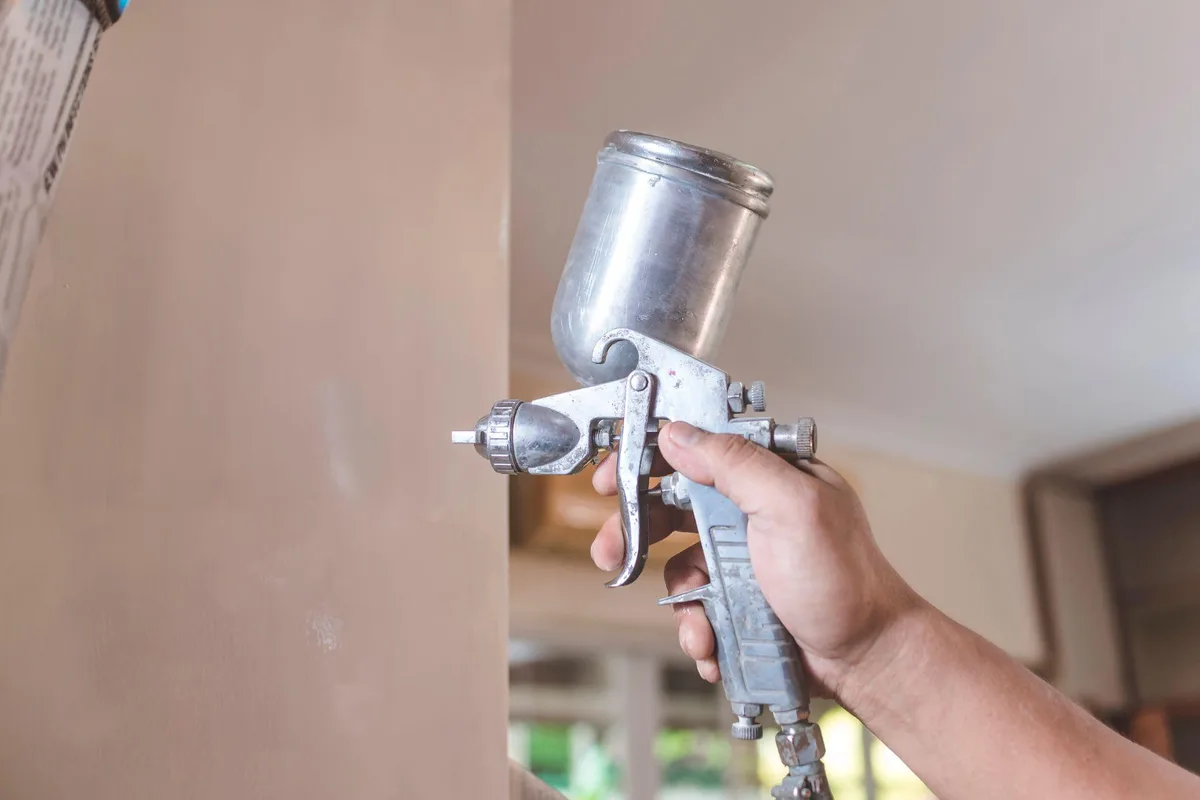
Airless paint sprayers rely on high hydraulic fluid pressure (ranging from 1,500 to 3,000 PSI) generated by a piston or diaphragm pump to force un-thinned paint through a tungsten carbide tip orifice. The sudden drop in fluid pressure upon exiting the tip atomizes the paint into fine droplets. Airless units excel at coating large surfaces like exterior siding, interior walls, and structural wood fences quickly.
High Volume Low Pressure (HVLP) sprayers use high volumes of warm turbine air delivered at low pressure (4 to 10 PSI) to atomize paint inside an air cap. HVLP units provide extreme transfer efficiency with minimal overspray, making them ideal for fine finish woodworking, interior doors, and cabinet refinishing. However, HVLP units require heavy material thinning to atomize thick latex paints.
If you are inspecting stored paint inventory in your workshop before setting up your spray equipment, read our technical feature on can you use old paint to test liquid product usability.
“Pro Tip 1: Fluid Pressure Atomization Threshold Testing. Never operate an airless sprayer at maximum pressure just to ensure full coverage. Excessive fluid pressure creates heavy overspray clouds, wastes up to 30 percent of your paint, and causes premature spray tip erosion. To calibrate pressure correctly, spray a test pass across a piece of cardboard at 1,000 PSI. If dark, heavy lines (tails or fingers) appear at the top and bottom edges of the fan pattern, increase the pressure knob in small 100 PSI increments. Stop adjusting the moment the fan pattern becomes a completely uniform, atomized mist from top to bottom.”
How Do You Choose the Right Paint Sprayer Tip Size?
Understanding spray tip numbering systems prevents material surges, clogging, and uneven film thickness. Airless spray tips feature a three-digit identification code stamped on the handle. The first digit represents half the fan width when holding the gun 12 inches from the surface. For example, a tip starting with a 5 produces a 10-inch spray fan (5 multiplied by 2). A tip starting with a 3 produces a 6-inch fan.
The second and third digits represent the size of the tip orifice in thousandths of an inch. Smaller orifice sizes (such as .011 or .013) are designed for thin liquids like lacquers, stains, and clear sealers. Medium orifices (.015 to .017) handle standard interior latex wall paints. Larger orifices (.019 to .023) are required for thick exterior acrylics, elastomeric coatings, and high-build block fillers.
If you are evaluating modern monochromatic color schemes across your walls and trim before spraying, explore our design feature on what is color drenching for single-hue application tips. For exterior stone or masonry care along patio edges, review our guide on can you clean limewashed brick for maintenance standards. Learn more about our national brand standards via That 1 Painter.
“Pro Tip 2: Fine Finish Low Pressure (FFLP) Tip Geometry. When spraying interior trim, doors, or cabinetry using an airless system, swap standard spray tips for a Fine Finish Low Pressure (FFLP) tip. FFLP tips feature a double-atomization internal pre-orifice that breaks down paint at 50 percent lower pressure (typically 900 to 1,200 PSI). Operating at lower pressure eliminates overspray bouncing off narrow trim faces, extends pump packing lifespan, and delivers a mirror-smooth finish comparable to an HVLP turbine.”
Technical Comparison of Paint Sprayer Tip Sizes and Applications
This technical reference table breaks down tip numbering codes, fan widths, orifice dimensions, and material compatibilities for residential spray painting.
- 311 / 411: 6 to 8 inch fan, .011 inch orifice. Clear sealers, polyurethane, lacquers. Best for fine woodworking and cabinet doors.
- 413 / 513: 8 to 10 inch fan, .013 inch orifice. Oil-based enamels and waterborne alkyds. Best for interior trim, doors, and window casings.
- 515 / 517: 10 inch fan, .015 to .017 inch orifice. Interior latex flat and satin wall paints. Best for sheetrock walls and smooth ceilings.
- 519 / 619: 10 to 12 inch fan, .019 inch orifice. Heavy exterior acrylic paints and wood stains. Best for exterior lap siding, fences, and decks.
- 621 / 623: 12 inch fan, .021 to .023 inch orifice. High-build elastomerics and masonry fillers. Best for stucco, cinder block, and commercial walls.
If you are refinishing cabinet doors, millwork, or built-in shelving, review our detailed guide on painting cabinets with doors for smooth preparation steps.
“Pro Tip 3: Prime Valve Pressure Relief Flushing Mechanics. Never leave waterborne latex paint sitting static inside an airless sprayer pump or high-pressure hose during lunch breaks or project pauses. Latex paint dries rapidly when exposed to trapped air inside gun packings, creating dried paint flakes that ruin spray tips upon restart. If pausing for more than 20 minutes, turn the pressure knob down, switch the prime/spray valve to Prime, submerge the spray gun tip in a bucket of clean water, and wrap the tip in a wet rag to prevent tip drying.”
Step-by-Step Guide on How to Use a Paint Sprayer
Follow this professional application process to ensure safe, controlled spray operation and even film thickness:
- Mask and Protect the Area: Remove furniture and cover flooring with heavy drop cloths. Tape 1-mil plastic sheeting across windows, light fixtures, and adjacent walls to contain airborne overspray.
- Strain Paint and Setup Sprayer: Pour your paint through a 50-mesh liquid filter bag into a clean 5-gallon bucket. Place the flexible intake tube into the paint and submerge the small prime return tube into a waste bucket.
- Prime the Pump and Fluid Line: Set the prime/spray valve to Prime and turn the pressure control to low. Turn the power switch on until paint flows consistently out of the prime tube into the waste bucket. Switch the valve to Spray to pressurize the fluid hose.
- Attach Tip and Calibrate Pressure: Disengage the trigger safety lock, attach your chosen spray tip guard, and adjust fluid pressure on a cardboard test target until outer tailing lines disappear.
- Execute Spray Passes with 50% Overlap: Hold the gun perpendicular to the wall exactly 10 to 12 inches away. Start moving your arm before pulling the trigger, release the trigger at the end of the stroke, and overlap each pass by 50 percent.
- Back-Roll Vertical Exterior Surfaces (If Needed): On textured stucco or rough-sawn wood siding, deploy a second worker with a 1-1/4 inch nap roller to back-roll the wet paint immediately, forcing the atomized mist into deep pores.
- Flush and Clean the Equipment: Flush the intake tube with clean warm water (for latex) or mineral spirits (for oil) until clear liquid flows through the prime tube and spray gun. Clean gun filters, tip guards, and pump packings before storing.
If structural drywall damage, water leaks, or tape seam cracks require sheetrock patching before spraying, utilize our expert drywall repair services. Combine surface repairs with our complete interior house painting services or exterior house painting services for long-lasting home protection.
Environmental regulations enforced by the U.S. Environmental Protection Agency (EPA) limit Volatile Organic Compounds (VOCs) in architectural paints while governing proper wash-water containment during spray equipment cleanup.
What Are the Most Common Paint Sprayer Mistakes to Avoid?
Avoiding these common DIY execution errors ensures your spray painting project produces smooth, even surfaces:
- Fanning the Spray Gun: Arcing your wrist at the end of a stroke varies the distance from the wall, causing thin paint application on the ends and heavy buildup in the center.
- Spraying Without Straining Paint: Pouring paint directly from old cans into the sprayer introduces dried skin bits that instantly clog spray tip orifices.
- Skipping Safety Equipment: Operating high-pressure airless sprayers without an N95/P100 respirator and eye protection exposes applicators to hazardous airborne solvent vapors and atomized paint particles.
- Neglecting Immediate System Flushing: Leaving wet paint inside an airless pump overnight ruins internal packings, check valves, and pressure controls, requiring expensive pump rebuilds.
Answers to Common Questions About Using a Paint Sprayer
Do you have to thin paint when using an airless paint sprayer?
No, commercial airless sprayers do not require paint thinning for standard interior latex or exterior acrylic paints. Their high hydraulic pump pressure easily atomizes un-thinned architectural coatings. Thinning is only required when using small DIY sprayers or HVLP turbine units.
How do you prevent overspray when using a paint sprayer?
To prevent overspray, lower your pump fluid pressure to the minimum setting that produces a clean spray fan. Use Fine Finish Low Pressure (FFLP) tips, mask non-painted surfaces thoroughly with plastic sheeting, and avoid spraying outdoors on windy days.
Why is my paint sprayer spitting drops of paint?
Paint sprayers spit drops when air is trapped inside the fluid hose, when the tip orifice is partially clogged with dried paint, or when the gun trigger is released too slowly. Ensure the fluid hose is fully primed, clear tip clogs by rotating the spray tip 180 degrees, and snap the trigger cleanly.
How do you clear a clogged spray tip during a job?
To clear a clogged airless spray tip, engage the gun trigger safety lock. Rotate the reversible spray tip handle 180 degrees so the arrow points backward. Disengage the safety lock, point the gun into a waste bucket, and pull the trigger once to blast the clog out, then rotate the tip back to the spray position.
Can high-pressure paint sprayers cause skin injuries?
Yes, airless paint sprayers operate at fluid pressures up to 3,000 PSI, which is strong enough to pierce skin and inject toxic paint deep into body tissue (high-pressure injection injury). Never point a spray gun at anyone, always engage the trigger safety lock when not spraying, and relieve system pressure before cleaning tips.
Workplace safety and equipment operating standards enforced by the Occupational Safety and Health Administration (OSHA) require proper respiratory protection, eye safety, and high-pressure fluid injection safeguards during residential spray painting operations.
Ready for Professional Interior Preparation and Home Painting Services?
Calibrating fluid pressure, selecting precise tip sizes, masking living spaces, and applying factory-smooth architectural spray coatings require technical skill and professional equipment. Let our experienced painting teams handle your interior or exterior spraying projects safely and efficiently.
Note: Pricing estimates are based on 2026 regional averages. Every home is unique, and final quotes require an on-site assessment to account for material costs, prep work, and structural conditions.
Contact That 1 Painter today to schedule your detailed, obligation-free on-site estimate and give your property a crisp, durable finish. Book Your Free Professional Estimate Now
