By Mary C.
Property owners executing rapid real estate flips or sudden weekend home updates across the United States frequently face tight renovation windows, leading them to ask a high-stakes operational question: can i paint a room in one day? The definitive technical and professional answer is yes, you can absolutely paint a room in one day, provided you follow a strict, multi-stage industrial schedule, utilize premium rapid-dry architectural coatings, choose specialized high-capacity application equipment, and control the room’s environmental variables to accelerate paint film polymerization. Attempting to rush through a full interior transformation without a coordinated timeline or running uncalibrated consumer tools results in immediate project failure. Pushing a fresh second coat over a partially dry baseline traps liquid solvents underneath the surface skin, causing the finish to wrinkle, blister, and lift away from the drywall sheet entirely. For residential real estate assets positioned throughout the varied regional housing markets of the United States, mastering a disciplined single-day painting workflow ensures absolute coating adhesion, delivers an unblemished look, and dramatically drives up temporary property equity values.
Overview
Executing a successful 24-hour room transformation requires an analytical understanding of paint resin chemistry, moisture evaporation curves, and critical substrate preparation metrics rather than simple speed rolling. Interior walls function as a delicate material canvas that continuously responds to ambient humidity levels and regional climate conditions. Across the distinct geographic climate zones of the United States, houses handle completely different indoor environmental profiles and seasonal property maintenance cycles. For example, homes in hot, humid Southern markets handle sticky summer air that can severely slow down paint dry times unless advanced air dehumidification setups are active, tightly insulated Northern properties endure cold winter drafts that require careful thermostat tuning to maintain optimal chemical curing zones, and modern Western layouts feature expansive, sun-flooded walls that will easily reveal any visible roller track lines or uneven lap marks under intense natural sunlight glare. Below, we break down the exact technical field schedules, advanced tool configurations, and master application steps required to finish a room refresh in a single day with absolute confidence.
Quick Reference One-Day Painting Timeline
- The 8:00 AM Preparation Window: Dedicate the first two hours of your single day room painting schedule entirely to clearing furniture, executing a deep chemical wash pass, and masking off baseboards.
- Premium Rapid-Dry Materials: Specify high-solids, 100% acrylic interior paints engineered with rapid-dry formulas that drop your required dry-to-recoat window down to a slim two hours.
- Continuous Mechanical Air Movement: Deploy heavy-duty industrial floor fans and commercial air scrubbers to cycle indoor air rapidly, forcing trapped water vectors out of the wet film.
- Strict Two-Coat Tracking: Maintain complete film coverage by executing a flawless two-coat layout pass, checking your layer depth continuously to prevent heavy puddling inside drywall textures.
The Industrial Chemistry and Physics of Rapid Paint Film Curing
Understanding the Difference Between Flash Drying and Structural Curing
To safely execute a single-day interior transformation, you must understand the exact physical chemistry that occurs as liquid paint transitions into a hardened plastic shield. Modern waterborne architectural coatings dry and harden through a dual-stage process: physical evaporation (flash drying) followed by chemical coalescence (structural curing).
When you guide a loaded roller across a drywall sheet, you lay down a wet film composed of acrylic resin polymers, mineral pigments, specialized flow additives, and liquid water vectors acting as the carrier fluid. The flash dry stage begins the instant the paint hits the wall, as air movement draws the water vectors out of the wet film and releases them into the room as vapor. As this water evaporates, the remaining acrylic polymer spheres are forced close together. They begin to deform, fuse, and cross-link into a continuous plastic sheet that feels completely dry to the touch.
However, feeling dry to the touch does not mean the paint film is ready to receive a heavy second coat. The underlying layers still contain trapped glycol solvents that must escape completely through micro-capillary paths. If you roll a fresh second coat of wet paint over a wall that has only flash-dried, you seal those micro-capillary paths completely. The trapped solvents cannot escape, building localized gas pockets that break the paint’s mechanical bond and cause widespread blistering, wrinkling, and early film peeling, an expensive structural defect we analyze in our technical guide on how to fix cracked or peeling paint.
The Interplay of Winter/Summer Humidity, Temperature, and Dew Points
The exact speed at which water vectors leave a wet paint film depends entirely on the surrounding air conditions inside your room. According to technical performance criteria monitored by the Master Painters Institute (MPI), waterborne acrylic coatings dry most efficiently when indoor temperatures are held between 65°F and 75°F (18°C to 24°C) and relative humidity levels sit safely below 50%.
If the air inside your room is highly saturated with moisture, it cannot absorb the water vectors evaporating from your wet walls, causing your required dry-to-recoat window to expand from a manageable two hours to an unmanageable eight hours or more. Professional painting crews manage this moisture barrier by checking ambient room conditions continuously using digital hygrometers and setting up climate controls before opening a paint can. Securing this stable foundation across expansive residential layouts requires clean, professional execution, a standard we provide through our comprehensive national interior painting services.
Technical Field Workflows for a Single Day Transformation
The Hour-by-Hour Master Production Schedule
To successfully finish a complete room painting project within a single 12-hour production window, you must follow a disciplined, linear timeline that structures your labor passes and environmental drying gaps perfectly.
The process initiates promptly between 08:00 AM and 10:00 AM with the critical preparation and masking block. During this initial two hours, pull all furniture to the center of the room and cover the items with clean lightweight plastic sheeting. Line your flooring perimeters with heavy-duty canvas drop cloths. Execute a fast chemical decontamination wipe-down around light switches using a damp sponge, and mask off your baseboards cleanly.
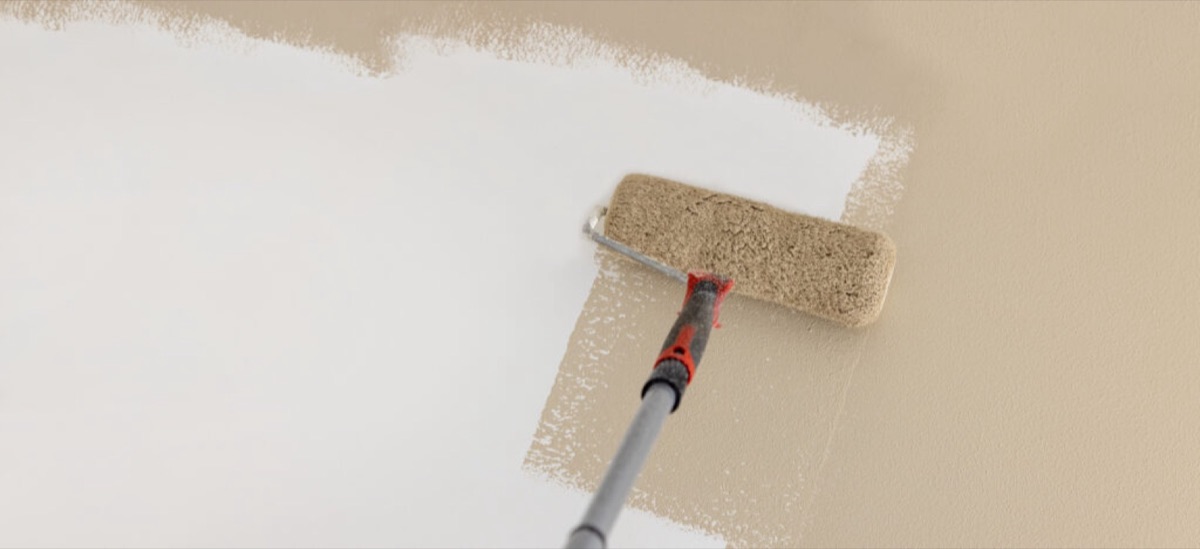
Next, the project shifts immediately into the first coat application pass from 10:00 AM to 11:30 AM. Cut in all ceiling lines, window frames, and baseboard corners using a premium 2.5-inch angled chiseled sash brush. Immediately roll out the large drywall fields using a high-capacity, non-shedding 3/8-inch nap microfiber roller sleeve, maintaining a continuous wet edge to prevent visible lap marks.
Once the first coat is uniformly distributed, trigger the forced air drying loop from 11:30 AM to 01:30 PM. Step out of the room completely, adjust your home’s central HVAC system to a steady 72°F (22°C), and position industrial floor fans to cycle air across the wet walls without blowing dust onto the wet film.
After verifying the first layer has stabilized, initiate the second coat completion pass between 01:30 PM and 03:00 PM. Follow your original cut-in paths and rolling sequences exactly to build a uniform layer depth across the entire room.
Finally, execute the tape pull and room reset block from 03:00 PM to 05:00 PM. Allow the final coat to set up for roughly one to two hours, pull away all your painter’s tape smoothly at a sharp 45-degree angle while the film is slightly loose, move your furniture back into place, and open the room back up for family use.
Pro Tip 1: The Cross-Hatch Adhesion Stability Field Test
Prior to launching an intensive, high-speed single-day painting project over an old, unknown finish, professional interior painters execute a cross-hatch tape adhesion test to verify if the existing substrate is stable enough to receive new coatings. Squeeze a sharp utility knife through the old paint layer down to the bare drywall core, cutting an eleven-line grid pattern with intersecting slices spaced exactly one millimeter apart. Press a strip of specialized high-tack testing tape firmly over the sliced grid, smooth it down with a squeegee, and pull the tape back quickly at a sharp 90-degree angle. If more than 5% of the small paint squares pull away on the tape, the existing coat is structurally unstable and must be stabilized with a high-bonding primer before applying new paint.
Substrate Alignment and Professional Tool Configurations
Selecting Precision Tooling to Eliminate Roller Tracking Lines
Applying a fresh coat of high-solids interior paint rapidly over expansive drywall sheets requires using high-quality application equipment to avoid leaving visible tool tracks behind. Cheap consumer paint rollers often use weak plastic cages that flex and bend under hand pressure, squeezing excess paint out of the sides of the sleeve and leaving behind sharp ridges known as track lines or lap marks.
Professional technicians completely eliminate track lines by using rigid, heavy-duty cast-aluminum five-wire cage roller frames connected to adjustable fiberglass extension poles. Load a premium 3/8-inch non-shedding microfiber roller cover fully with your paint, and guide the tool across the wall field in long, continuous vertical strokes from ceiling to floor, overlapping each pass by exactly 50%. Keep your rolling speed steady and avoid pushing down hard against the pole; let the frame’s weight distribute the wet paint evenly across the drywall, allowing the paint’s built-in self-leveling chemistry to dry into a perfectly flat, uniform layer. This uniform care ensures a clean backdrop that works beautifully to modernize large rooms, an advanced design strategy we analyze in our guide to what is color drenching.
Eliminating Suction Flashing via Targeted Sealer Passes
Spraying or rolling an advanced interior home paint over unprimed drywall repairs, fresh joint compound patches, or deep nail hole fills can cause a noticeable surface defect known as suction flashing or ghosting. Raw joint compound behaves exactly like a porous sponge, absorbing the moisture out of wet paint rapidly. This rapid localized moisture loss ruins the paint’s natural self-leveling process, leaving behind flat, dull, blotchy patches along your repairs that stand out clearly under bright light.
To prevent suction flashing during high-speed single-day projects, professional painters apply a dedicated layer of a rapid-drying, low-VOC polyvinyl acetate (PVA) drywall primer sealer over all raw repairs before rolling your finish coats. This primer seals porous surfaces completely in less than thirty minutes, ensuring your topcoats dry at a continuous, uniform rate across the wall plane, an essential preparation baseline step detailed in our master manual on when to use primer on walls. For updating old interior accents or masonry brick panels, matching these clean steps is equally critical to secure a high-quality finish, as outlined in our technical resource on can you clean limewashed brick.
Pro Tip 2: The Multi-Surface Masking Knife Tape Activation Step
Achieving razor-sharp, professional paint lines along baseboards, window casings, and door headers requires mastering advanced geometric masking techniques. Simply sticking painter’s tape along an edge is not enough to stop liquid leaks. Standard wood trim features small grain variations and subtle surface dips that create microscopic gaps beneath flat tape. Professional painters press down firmly along the entire edge of high-quality tape using a hard plastic putty knife. This physical pressure activates the tape’s pressure-sensitive acrylic adhesive backing, molding it tightly into every tiny dip in the wood trim to create an absolute barrier against liquid paint seepage, a standard we maintain across all home projects, including custom kitchen work outlined in our guide onpainting cabinets with doors.
How Do United States Housing Styles and Climates Change Your Project?
How Regional Air Quality and Weather Alter Interior Paint Curing
To ensure your single-day home restoration holds up beautifully over time, your team must align their color palettes, tool configurations, and curing windows with the climate conditions of your local environment. According to research certified by the Painting and Decorating Contractors of America (PDCA), regional weather changes can directly change how heavy paint films dry and how your tools behave.
In humid coastal regions or during sticky summer months across the Central states, high moisture levels in the air slow down the water evaporation process significantly. When rolling a thick paint film over a room wall under high humidity, the wet paint layer traps solvents longer, extending your dry-to-recoat window from a standard two hours to four hours or more. Professional crews track these ambient conditions using digital hygrometers, running central air conditioning or dehumidifiers to stabilize the indoor workspace before starting application, a protective environmental standard we offer through our regional franchise territories.
Managing Direct Southern Sunlight and Historic Northern Plaster
The style and age of your home play a major role in your overall color choices and material budgets. Older historic homes across the United States often feature traditional lath and plaster walls rather than modern paper-faced drywall panels. Plaster is a dense, highly porous material that expands and contracts differently than drywall, which frequently leads to minor stress cracks along window frames and door headers as the foundation shifts over time.
Plaster surfaces absorb water from coatings rapidly, requiring a dedicated alkali-resistant primer coat to stabilize the wall before painting, an essential technique outlined in our resource on can you clean limewashed brick. When updating a historic home for the market, choosing a clean whole house color palette layout helps maximize buyer appeal, a design strategy we analyze in our real estate guide on selecting paint choices that increase home value.
For modern homes with large open-concept floor plans, your paint application must be flawless because long walls flooded with sunlight from large windows will easily reveal every single minor bump or uneven texture. Using proper pole sanders, premium primers, and fine-finish rolling steps is the only way to ensure your expansive walls look beautiful and uniform under intense natural light, a professional standard we provide through our nationwide services.
Single-Day Interior Painting Production Index
Review this database reference matrix to match your specific room sizes and home assets with the correct professional tools, chemical additives, and dry-time targets required to prevent coating failures.Room Footprint ClassificationTarget Drywall Surface AreaRecommended Roller Nap SizeMinimum Drying Forced Air SetupRequired Dry-To-Recoat WindowCompact Half BathroomUnder 150 Square Feet3/8-Inch Microfiber Sleeve1 Axial Exhaust Fan1.5 to 2 Hours MaxStandard Guest Bedroom300 to 450 Square Feet3/8-Inch Microfiber Sleeve2 Industrial Floor Fans2 Hours SteadyMaster Bedroom Suite600 to 800 Square Feet1/2-Inch Knitted Sleeve3 Floor Fans / HVAC Loop2.5 Hours ControlledOpen Concept Great RoomOver 1,200 Square Feet1/2-Inch Knitted SleeveFull Air Scrubber Matrix3 Hours MonitoredWindowless Utility DenUnder 200 Square Feet3/8-Inch Microfiber Sleeve1 Dehumidifier Unit2 Hours Steady
FAQs
Can you safely skip applying a second coat of paint if the first coat looks completely solid?
No, you should never skip applying a second coat of paint, even if the first coat appears completely solid and uniform on your drywall sheets. A single coat of paint naturally dries with microscopic holes and thin patches where the underlying primer can grin through under bright natural light. Applying a dedicated second coat builds the correct dry film thickness (DFT) required to satisfy manufacturer warranty specifications, protects your walls against everyday scuffs, and ensures the paint achieves its true color richness and washability.
Why does painter’s tape sometimes leave jagged, messy edges when pulled away from wood trim?
Painter’s tape will leave jagged, messy edges if the tape is left on the wall for too long after application, or if you fail to pull the tape away while the paint is still wet. If you allow your new topcoat to dry and cure completely over the tape line, the acrylic resins will form a continuous plastic sheet across the tape edge. Pulling dry tape away later will tear the hardened paint film along the wall. Always pull your painter’s tape back smoothly at a sharp 45-degree angle while the final coat is still slightly wet. Pro Tip 3: The Wet Film Thickness Notch Calibration Pass To ensure your final coated interior partitions achieve their full durability, maximum color richness, and intended wash resistance once you select your palette, you must control your material application rates precisely. Professional painting crews check their paint layers continuously using stainless steel wet film thickness (WFT) notch gauges. When rolling over a drywall field, ensure the wet paint layer measures a consistent 3.5 to 4.0 mils per coat. This controlled layout guarantees that as the liquid carrier evaporates, the remaining solids build a dry film thickness (DFT) that satisfies strict manufacturer warranty specifications and prevents early paint cracking.
Do you need to wash your walls with a chemical cleanser before painting them in a single day?
Yes, executing a quick chemical wipe-down pass around high-traffic zones, including doorknobs, baseboards, and light switch plates, is a mandatory step required before painting a room in one day. High-traffic walls accumulate a thick layer of invisible body oils, cooking greases, and household dust over time. If you try to roll fresh paint directly over these oily contaminants, the new paint binders will cling to the grease instead of the drywall, resulting in immediate blistering and peeling.
What is the safest paint sheen to ensure a cohesive color flow between rooms?
An eggshell or matte finish is generally preferred for the main walls to ensure smooth color flow across all interior spaces, while a semi-gloss finish is ideal for baseboards and doors. Eggshell provides a beautiful, soft look that hides minor drywall defects while offering high washability and steady light reflection. This low-reflection look allows colors to transition smoothly between dark hallways and bright rooms without creating harsh reflections or glare that can break visual continuity.
How long should you wait before hanging heavy pictures back up on a newly painted wall?
While a rapid-dry interior paint film can dry to the touch in less than two hours, you should wait a minimum of five to seven days before pressing heavy picture frames, hanging mirrors, or placing large furniture items flush against a newly painted wall. Modern waterborne acrylic coatings require multiple days to complete their chemical cross-linking cycle and reach full hardness. Pressing items against the wall early can cause the paint to stick to the frames, a mechanical failure known as blocking that will pull the paint away down to the bare primer when the item is moved.
Ready to Transform Your Space in Record Time with Flawless Care?
Refreshing your home interior walls and ceilings with an advanced, fast-drying coating system executed by a trained professional crew is the fastest way to protect your investment and dramatically boost your real estate value. Don’t risk messy lines, flashing patches, or wrinkled paint surfaces on your home’s finest features.
Reach out to the expert national team at That 1 Painter today to schedule your detailed, obligation-free on-site project estimate, and give your property the beautiful, long-lasting protection it deserves.
Book Your Free 24-Hour Painting Estimate Now
