If you want awesome looking cabinets, cabinet sanding is the make or break step.
Do I have to sand my cabinets before painting is one of the most common questions and the short version is simple: unfinished bare wood cabinets usually do not need heavy sanding, but painted, sealed, glossy, or factory finished cabinets almost always need a scuff sand. Not because you have to sand everything to bare wood, but because paint needs something to adhere to.
Cabinets are high-touch surfaces, especially around handles, and grease builds up there even when you cannot see it. If you paint over slick finishes or oily residue, the paint might look fine for a week, then starts chipping, peeling, or feeling rough and gritty.
This guide gives you fast answers first, then the deeper why behind each option so your cabinets look smooth now and hold up later and your cabinet painting is easier than ever.
Quick Picks by Cabinet Surface
Quick and to the point guide to cabinet sanding by surface type.
- Unfinished bare wood: light smoothing for feel, then prime and paint
- Previously painted: degrease, scuff sand, bonding primer as needed, then cabinet enamel
- Stained and sealed: scuff sand to dull the clear coat, bonding primer, then cabinet enamel
- Glossy or factory finished: thorough scuff sand, bonding primer, then cabinet enamel
- Laminate or thermofoil: careful scuff sand, bonding primer for slick surfaces, cabinet coating system
- Peeling or flaking: remove loose paint, feather edges, prime, then paint
Quick Steps to Cabinet Sanding
This is the fastest way to avoid the most common DIY mistakes.
1) Cleaning
Degrease first, especially around handles, corners, and lower doors.
Do not sand first. You can grind invisible oils into the surface and make adhesion worse.
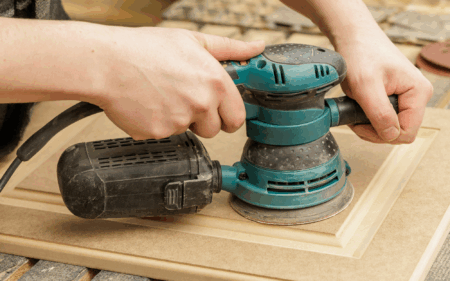
2) Scuff Sanding
Use 180 to 220 grit for most cabinets. Your goal is to dull the sheen, not strip to bare wood.
Avoid super coarse paper that leaves scratches, and avoid ultra-fine paper that barely touches the surface.
3) Dust Removal
Vacuum thoroughly (a brush attachment helps), then wipe down to catch anything the vacuum missed.
If you paint over sanding dust, it becomes permanent grit in the finish and ruins your cabinet paint.
4) Priming
Prime anything painted, sealed, glossy, laminate, or factory finished with a bonding primer.
Skipping primer is one of the main reasons cabinet paint peels later.
5) Painting
Use cabinet and trim enamel in two thin coats (sometimes three for big color changes).
Thick coats stay soft longer, show more texture, and mark easier during curing.
What is Scuff Sanding?
Most homeowners hear “sand cabinets” and imagine hours of misery and bare wood everywhere. In most cases, that is not the job.
Scuff sanding means lightly dulling the surface and creating microscopic scratches so primer and paint can grip. You are not stripping the cabinets. You are removing shine and creating tooth.
You did it right when:
- The surface looks evenly dulled with no glossy spots
- Edges and profiles feel lightly scuffed, not chewed up
- You do not see deep scratches through the finish
- The cabinet feels slightly “grabby” instead of slick
The Right Order Matters More Than the Sanding

If you remember one process rule, use this:
Clean, scuff sand, remove dust, prime, paint.
The reason is simple. Kitchens collect invisible oils around handles and edges. If you sand before cleaning, you can push oils into the surface and reduce adhesion. Then if you skip proper dust removal, you trap grit under primer and enamel.
How Much Cabinet Sanding Do You Actually Need?
This depends on what is already on the cabinets. Here is the simplest way to think about it:
- If the surface is porous (raw wood): sanding is mainly for smoothness and feel
- If the surface is sealed or slick (paint, clear coat, factory finish, laminate): sanding is for adhesion
Unfinished Bare Wood Cabinets
Bare wood usually has natural tooth, so you typically do not need aggressive sanding for adhesion. What you do need is refinement.
Focus on:
- Smoothing rough spots and sharp edges
- Knocking down fuzzy grain
- Blending filler repairs so they disappear under paint
If the wood feels rough now, it will look rough after paint. Cabinet finishes do not hide flaws. They highlight them.
Previously Painted Cabinets
Paint over paint can work very well, but only if the existing coating is solid and clean.
What you are doing here:
- Removing grime and oils so primer bonds
- Dulling the old paint so the new system grips
- Smoothing old texture so the new finish looks cleaner
If the old paint is peeling, address that first. New paint does not fix a failing base layer.
Stained and Sealed Cabinets
Stain and clear coat are designed to resist moisture and wear. That is exactly why paint needs help sticking.
Your goal is not to remove the clear coat completely. Your goal is to remove the sheen and then use a bonding primer to lock it down. You can move on to the cabinet painting step after the primer has dried.
Common failure point: corners and profiles that stay shiny because they were not scuffed enough.
Glossy or Factory Finished Cabinets
These are the highest “looks clean but fails later” category. Factory finishes are made to resist abrasion and cleaning, so they resist paint too.
Best practice:
- Degrease thoroughly
- Scuff sand until the shine is gone everywhere
- Prime with a bonding primer
- Topcoat with cabinet enamel in thin coats
Most cabinet failures start on edges. Do not ignore them.
Laminate or Thermofoil Cabinets
These surfaces can be painted, but they are the highest adhesion risk. They need two forms of adhesion:
- Mechanical adhesion: careful scuff sanding
- Chemical adhesion: bonding primer designed for slick surfaces
If you skip either one, the finish may look fine at first and then scratch off under normal use.
Cabinets With Peeling or Flaking Paint
This is not a scuff sand situation. You need to stabilize the surface.
What to do:
- Remove loose paint until only solid material remains
- Feather the edges smooth so you cannot feel a ridge
- Prime, then paint
Painting over peeling paint guarantees the new paint peels with it.
What Sandpaper Grit Should You Use on Cabinets?
For most cabinet projects, 180 to 220 grit is the sweet spot.
- 180 grit: use when the surface is very glossy or you need more dulling power
- 220 grit: use for most scuff sanding and as a finishing pass for a smoother base
If you start with 180, a quick pass with 220 afterward is often worth it. It reduces scratch visibility and helps the finish look more refined.
The Dust Step That Separates Smooth Cabinets From Gritty Cabinets
Many “gritty cabinet” complaints are not a paint problem. They are a dust problem.
After sanding:
- Vacuum doors, frames, and profiles with a brush attachment
- Vacuum the surrounding floor so you do not kick dust back up
- Wipe down after vacuuming to catch anything left behind
If you only wipe without vacuuming, you often smear dust into corners and grain. Primer locks it in and you feel it forever.
Primer and Cabinet Paint Choices That Match the Job
Sanding helps, but the coating system is what makes the finish durable. Cabinet paint and primer matter.
When to Use a Bonding Primer
Use a cabinet primer when cabinets are:
- Painted
- Sealed or clear-coated
- Glossy or factory finished
- Laminate or thermofoil
- Unknown coating type
Bonding primer is the layer that prevents peeling and edge chipping later.
What to Use for the Topcoat
Use cabinet and trim enamel, not wall paint.
- Cures harder
- Levels smoother
- Resists scuffs and fingerprints better
- Cleans easier in kitchens
Apply two thin coats, sometimes three if you are covering a dark color with white or making a major color shift.
Common Cabinet Painting Mistakes

If you want the shortest “avoid peeling paint and rough texture” list, it is this:
- Degreasing poorly around handles and edges
- Sanding before cleaning
- Leaving shiny spots in corners and profiles
- Painting over sanding dust
- Skipping bonding primer on slick surfaces
- Using wall paint instead of cabinet paint (enamel)
- Applying thick coats to “save time”
- Handling doors too soon before the enamel has time to cure
FAQ: Sand My Cabinets Before Painting
Do I have to sand if I use bonding primer?
Usually yes. Bonding primer helps, but scuff sanding improves consistency and smoothness, and reduces failure risk.
Do I need to sand down to bare wood?
Usually no. Only go to bare wood where the existing coating is failing or peeling.
How do I know I sanded enough?
The surface should look evenly dull with no shiny patches. Shiny spots are where paint adhesion fails first.
Can I use a liquid deglosser instead of sanding?
Sometimes, but sanding is more reliable and also smooths minor defects. Deglossers can work if you follow directions exactly, but they do not level drips or texture.
Sand My Cabinets Before Painting Bottom Line
If your cabinets are unfinished bare wood, sanding is mainly about smoothness and feel. If your cabinets are painted, sealed, glossy, factory finished, laminate, or thermofoil, scuff sanding is an adhesion step and it is one of the smartest things you can do to prevent peeling later.
Clean first, scuff sand, remove dust, apply bonding primer, then cabinet enamel in thin coats. That system is what makes cabinets look smooth now and hold up later.
Want cabinet paint that looks professional without the trial-and-error? Contact That 1 Painter for a quote and we will walk you through the right prep and coating system for your cabinet type.