The Rise of DIY House Painting: How Homeowners Took the Brush into Their Own Hands
That 1 Painter is the fastest-growing painting company in the world. Painting your house can be complicated, but with our expertise, we make the process easy and stress-free for homeowners. With locations across the nation, we have helped tens of thousands of homeowners make the best choices for their homes without sacrificing quality, and we are here to show you how.
The Essentials of DIY House Painting
To successfully tackle a DIY house painting project, we must focus on two key areas: selecting the right paint and understanding which tools and supplies we will use. Both aspects are crucial for achieving a professional-looking finish.
Understanding Paint and Color Selection
Choosing the right paint can make a big difference in the outcome of our project. We need to consider the type of finish, such as matte, eggshell, or semi-gloss. Each finish has its benefits depending on the room. For example, we might prefer a semi-gloss for bathrooms due to its moisture resistance.
Selecting the right color is equally important. Light colors can make a room feel larger and more open, while darker colors can add depth and coziness. We should always test paint samples on the wall before making a final choice. This gives us a better idea of how the color looks in different lighting throughout the day.
Essential Painting Tools and Supplies

Having the right tools can streamline our painting process. Here’s a list of essential DIY painting supplies:
- Paint Rollers: Great for covering large areas quickly.
- Paint Brushes: Best for edges and detailed work.
- Drop Cloths: Protects floors and furniture from spills.
- Painter’s Tape: Helps create clean lines between colors.
- Paint Tray: Holds the paint for easy access.
Before we start painting, we should gather all supplies. This prep work helps us avoid disruptions during the job. By investing in quality tools, we make our painting experience smoother and more enjoyable.
Preparation for Painting
Proper preparation is crucial for achieving the best results before we start painting. This includes surface preparation, priming, and setting up a safe workspace.
Surface Preparation and Priming
We must clean the surfaces we plan to paint. This can involve washing walls to remove dirt, dust, and grease. We should also check for any damage like cracks or peeling paint. If we find any, repairing these issues is essential before proceeding.
Wwe might want to use a primer. Priming helps the paint adhere better and enhances the paint’s color. For beginners, selecting the right primer can make a significant difference. It can also help if we choose a primer based on the type of surface, whether it’s drywall, wood, or metal.
Once we apply the primer, it’s important to allow it to dry completely. A smooth, well-prepped surface sets the stage for a professional-looking finish.
Safety Measures and Workspace Setup
Creating a safe workspace is another key aspect of our preparation. We should start by ensuring good ventilation, especially if we’re working indoors. Opening windows or using fans can help with air circulation.
We must wear protective gear, including gloves, masks, and goggles, to shield ourselves from dust and harmful fumes. Keeping our workspace organized also plays a vital role; we should clear away unnecessary items and cover furniture with drop cloths to protect it from paint splatters.
Setting up proper lighting can aid visibility, allowing us to see any imperfections before painting. We can use a sturdy ladder if we need to reach high areas, ensuring it’s placed on a flat surface for stability. Following these steps will help us paint safely and effectively.
Painting Techniques and Methods
When we take on DIY house painting, using the right techniques helps achieve excellent results. We can use different methods to enhance our skills in brushwork and roller application, making the painting process smoother and more efficient.
Brushwork Skills for Precision
Using a brush allows us to reach tight spaces and create detailed edges. To start, we should hold the brush near the base of the handle for better control. Dipping half the bristles in paint without overloading is crucial. Lightly tapping the brush on the can’s lip helps remove excess paint.
For cutting in around windows or doors, we recommend using a 1-2 inch brush. This size offers better control for detail work. One effective technique is to apply paint in long, smooth strokes. Maintaining a steady hand and using just enough pressure will allow the bristles to bend slightly. This approach helps produce straight lines and avoids drips.
Roller Techniques for Efficiency
Rollers are excellent for covering large areas quickly. To use a roller effectively, we should first choose a nap that fits our surface texture. A 3/8 to 1/2 inch nap works well for smooth walls, while a thicker nap is better for textured surfaces.
When loading the roller, we should dip it in paint and then roll it on a tray to remove excess. It’s important to apply paint in a “W” pattern across the wall. This method ensures even coverage without streaks. We should roll in one direction when finishing each section. This helps blend layers and gives a uniform finish.
By mastering these techniques, we can transform our living spaces while taking pride in our DIY efforts.
Project Execution
Successfully executing a DIY house painting project requires careful planning.
Painting Interiors: A Room-by-Room Guide
When we paint interiors, it’s helpful to tackle one room at a time. This helps maintain focus and minimize chaos. We start by prepping the room, which includes removing furniture or covering it with drop cloths.
- Gather Materials: We need paint, brushes, rollers, painter’s tape, and drop cloths. It’s essential to choose high-quality paint for better coverage.
- Preparation: Clean the walls and repair any damages. Apply painter’s tape around windows, door frames, and baseboards to ensure sharp lines.
- Painting: Using a roller, we apply paint to larger areas, while brushes are ideal for edges and corners. It’s wise to use two coats for depth and durability.
- Final Touches: Once dry, we remove the tape carefully for clean lines. Lastly, we can re-arrange furniture and enjoy our freshly painted space.
Exterior House Painting Considerations

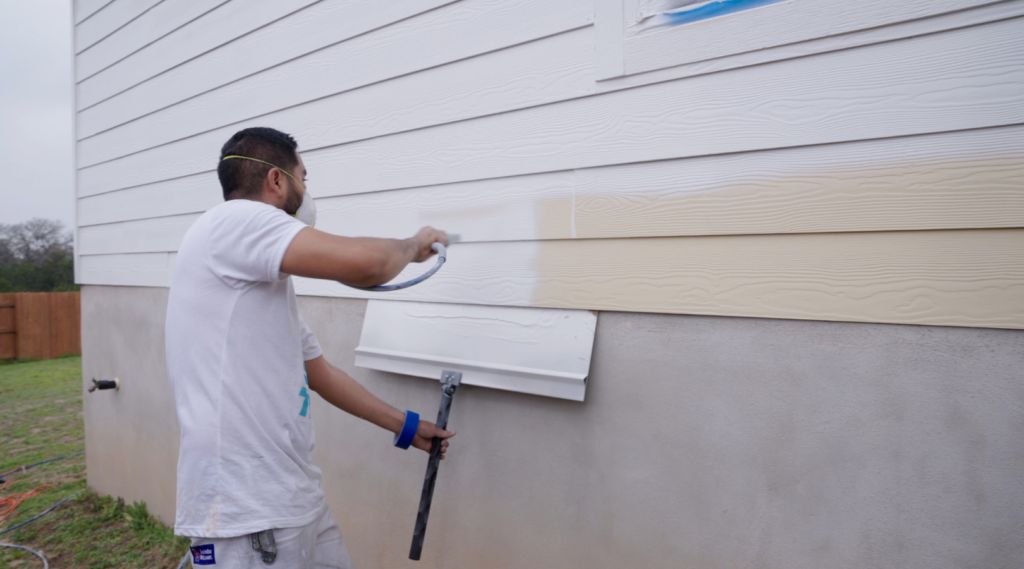
For exterior house painting, we must consider factors like location, weather, and material condition. These elements can significantly affect the project’s success.
- Preparation: We clean the exterior thoroughly to remove dirt and mildew. Minor repairs should be addressed before painting.
- Choosing Paint: Selecting the right paint is crucial. Exterior paints should resist weather and UV rays.
- Technique: We typically apply paint using a spray method for large sections and a brush or roller for edges. This method can speed up the process and give a uniform finish.
- Timing: Painting in moderate weather is important. Ideally, we should avoid days with high humidity or extreme temperatures, as these can affect drying time.
By focusing on these steps, we can achieve great results in our DIY painting projects.
Cost Management
Managing costs effectively is crucial for successful DIY house painting projects. By planning our budget, we can keep expenses in check while achieving impressive results.
Budget Planning for Home Painting Projects
We should determine how much we are willing to spend, including costs for paint, supplies, and any extra tools we may need.
We can break down the expenses into specific categories:
- Paint: Estimate the total amount needed based on room size and paint type. Prices can vary from $15 to $60 per gallon.
- Supplies: Factor in brushes, rollers, painter’s tape, drop cloths, and ladders. A basic supply kit may cost between $50 to $150.
- Labor (if needed): If we’re hiring help, include labor costs, ranging from $25 to $100 per hour.
Having a clear budget helps us track our spending and avoid surprises.
Cost-Saving Tips for DIY Painters
We can use several strategies to reduce costs while painting our homes. Here are some effective tips:
- Choose budget-friendly paint: Look for options that offer quality at a lower price. Brands like Behr or Valspar provide reliable choices without breaking the bank.
- Buy in bulk: Purchasing larger quantities of paint may lead to discounts. Check local stores for sales or clearance items.
- Reuse equipment: Instead of buying new tools for each project, we can clean and store brushes and rollers for future use.
- Plan ahead: Scheduling our painting during off-peak seasons can help us take advantage of lower prices.
By focusing on these cost-saving measures, we can make our DIY home improvement projects affordable and enjoyable.
Maintaining Your Paint Job
To keep our paint job looking fresh, we need to perform regular maintenance. This helps protect our hard work and extends the life of the paint.
Routine Cleaning
We should clean our painted surfaces at least once a year. Use a soft cloth or sponge and mild soap mixed with water. Avoid harsh chemicals that can damage the paint.
Inspect for Damage
We need to routinely check for any peeling, chipping, or fading. If we find areas needing touch-up, we should address them quickly to prevent further damage.
Addressing Mildew and Dirt
If we notice mildew growing, we can use a solution of bleach and water to remove it. Always rinse thoroughly. Regular cleaning keeps our home looking great and prevents buildup.
Repainting When Needed
Every few years, we may need to repaint sections of our home. Pay attention to areas that get more sun or rain, as they may fade faster.
Use Quality Products
Investing in quality paint and supplies makes a big difference. High-quality paints often offer better durability and easier maintenance.
By following these simple steps, we can maintain our DIY paint job effectively. Keeping our home looking its best is an ongoing effort that pays off in the long run.