Expert Cabinet Painting Will Transform Your Kitchen | That 1 Painter Fort Worth
That 1 Painter is the fastest-growing painting company in the world. Painting your space can be complicated, but with our expertise, we make the process easy and stress-free for homeowners. With franchises across the nation, we have helped tens of thousands of homeowners make the best choices for their homes without sacrificing quality, and we are here to show you how.
Expert Cabinet Painting Will Transform Your Kitchen | That 1 Painter Fort Worth
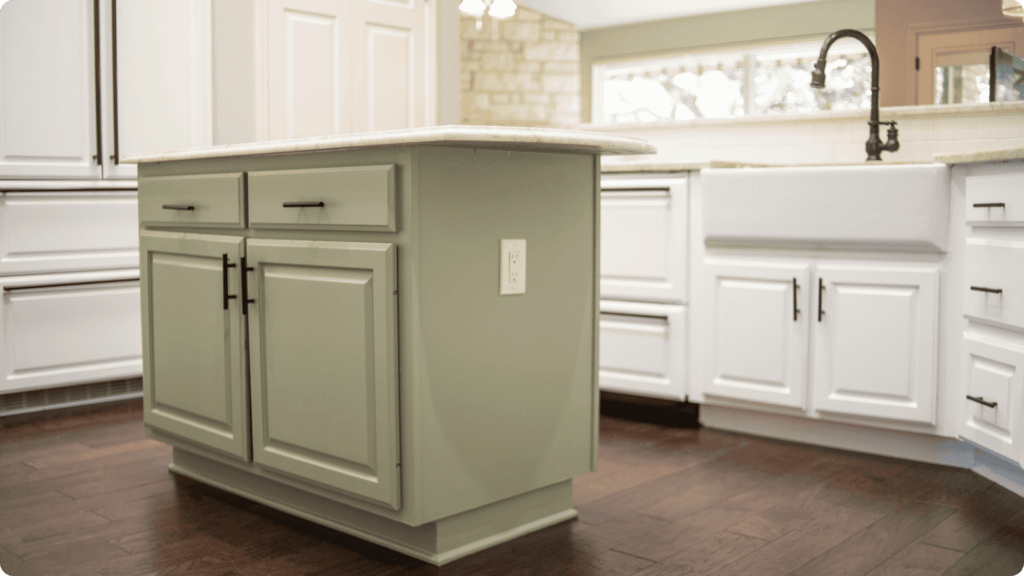
A kitchen makeover doesn’t have to cost a fortune. In fact, cabinet painting is one of the most effective ways to refresh your space without breaking the bank! Homeowners who opt for painting instead of replacing their cabinets can save thousands of dollars while still achieving a brand-new look. At That 1 Painter Fort Worth, we specialize in professional cabinet painting that brings style, durability, and value to your home. Let’s dive into why cabinet painting is the perfect solution for your home transformation.
Many homeowners think the only way to update their kitchen is by replacing their cabinets entirely. But that’s not true! Expert cabinet painting offers several benefits that make it the superior choice.
- Saves money – Refinishing your cabinets costs a fraction of what a full replacement does. Instead of investing in expensive new cabinetry, professional painters can transform your existing cabinets with high-quality finishes.
- Faster than remodeling – No need to deal with weeks of kitchen downtime. Cabinet painting is a quick and efficient process, allowing you to enjoy your refreshed space sooner. Interior painters specialize in delivering fast results without compromising quality.
- Eco-friendly – Reduce landfill waste by reusing existing cabinets. Kitchen painting is a sustainable choice that helps minimize environmental impact while still achieving a stunning new look.
- Endless color options – Choose from a variety of colors and finishes to match your style. Whether you prefer classic white, bold hues, or modern neutrals, expert cabinet painting allows you to personalize your kitchen effortlessly.
- Increases home value – Freshly painted cabinets can boost resale value and attract buyers. A professional cabinet painting job enhances the overall aesthetic, making your home more appealing to potential buyers searching for a move-in-ready property.
When searching for painters near me, it’s essential to choose experienced professionals who understand the intricacies of cabinet painting. Hiring professional painters ensures a flawless finish, long-lasting durability, and a beautiful kitchen transformation without the high cost of replacement. Investing in expert cabinet painting is a smart decision that brings style, savings, and sustainability to your home.
Choosing the Right Paint for Your Cabinets
Not all paints are created equal! When it comes to expert cabinet painting, the right type of paint makes all the difference. Professional painters know that selecting high-quality paint ensures durability, a flawless finish, and long-lasting beauty.
Best Paint Types for Cabinets
- Acrylic latex paint – Dries quickly and resists yellowing. This is a great option for kitchen painting, as it offers a smooth application and easy cleanup.
- Oil-based paint – Provides a smooth, durable finish but takes longer to dry. Many interior painters recommend this for its resilience and superior adhesion.
- Alkyd paint – A hybrid option that combines durability with easy application. It’s a top choice among professional painters for achieving a long-lasting, high-quality look.
Choosing the Perfect Finish
- Satin finish – Soft, velvety look with slight sheen. This finish is ideal for expert cabinet painting, as it balances elegance with practicality.
- Semi-gloss finish – Popular choice for kitchens due to its durability. It’s resistant to moisture and stains, making it a preferred option for kitchen painting projects.
- High-gloss finish – Modern and sleek but shows imperfections more easily. If you’re searching for painters near me, ensure they specialize in cabinet painting to achieve the perfect high-gloss finish without flaws.
Choosing the right paint for your cabinets is essential to achieving a professional, polished look. Whether you prefer a classic or contemporary style, expert cabinet painting by skilled interior painters can transform your space and enhance your home’s overall appeal.
Essential Tools & Materials for a Professional Finish
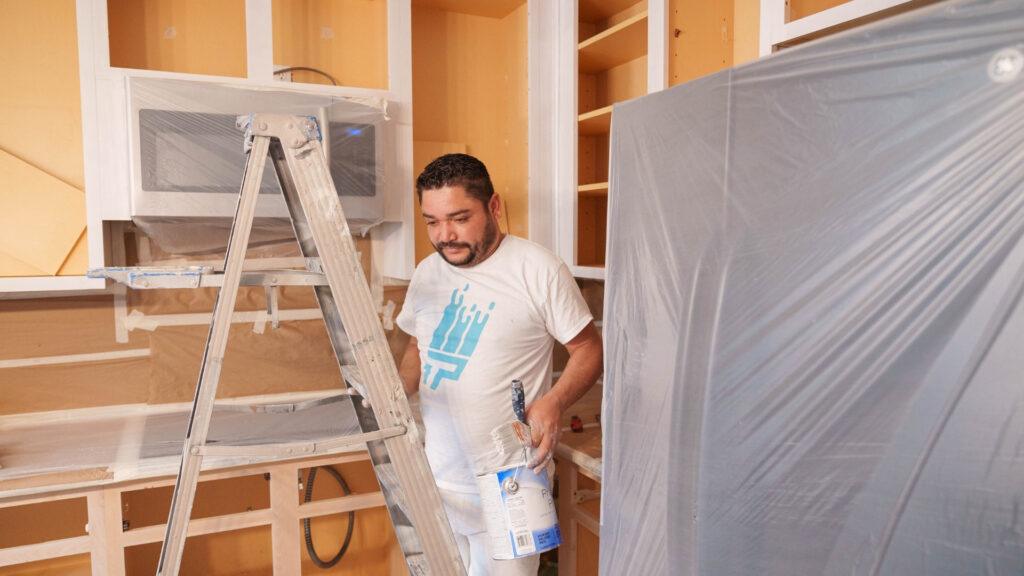
Achieving a flawless expert cabinet painting job requires the right tools and materials. Professional painters rely on high-quality equipment to ensure smooth, durable, and long-lasting results. If you’re planning a kitchen painting project, having the best supplies on hand will make all the difference.
Must-Have Tools for Cabinet Painting
- High-quality paint brushes and foam rollers – The key to a smooth application is using professional-grade brushes and rollers. Foam rollers help minimize streaks and bubbles, creating an even finish. Interior painters often use angled brushes to reach corners and detailed areas.
- Painter’s tape – Essential for protecting walls, countertops, and surrounding surfaces. Proper taping prevents unwanted paint marks and helps achieve crisp, clean lines.
- Sandpaper – Prepping cabinets is crucial for expert cabinet painting. Sanding removes old finishes, smooths imperfections, and allows the primer and paint to adhere properly. Using a fine-grit sandpaper (such as 220-grit) ensures a polished surface without causing damage.
- Degreaser – Kitchen cabinets accumulate grease and grime over time. Before painting, a strong degreaser is necessary to remove built-up residue, ensuring proper adhesion of the primer and paint.
- Primer – A quality primer enhances adhesion, prevents stains from seeping through, and promotes a long-lasting finish. Professional painters recommend an oil-based or bonding primer for superior durability.
- Screwdrivers – Removing cabinet doors, drawers, and hardware before painting allows for a more thorough and professional result. Keeping screws and handles organized ensures a seamless reassembly process.
Additional Supplies for a Perfect Finish
- Drop cloths – Protect floors and countertops from paint drips and spills. Investing in canvas drop cloths is ideal, as they absorb paint without causing slips.
- Microfiber cloths – Wiping down cabinets after sanding and degreasing helps remove dust and debris, creating a clean surface for painting.
- Paint sprayer – For a truly professional, factory-like finish, many expert cabinet painters use a paint sprayer. It delivers even coverage and a smooth, streak-free look, especially for high-gloss finishes.
- Wood filler – If your cabinets have scratches, dents, or holes, applying wood filler before painting ensures a flawless, smooth surface.
Proper Ventilation & Safety Equipment
Cabinet painting requires proper ventilation, especially when using oil-based primers or paints. Open windows, use fans, and wear a respirator mask to avoid inhaling fumes. Safety goggles and gloves protect against paint splashes and chemical exposure.
Achieving a professional cabinet painting finish isn’t just about applying paint—it’s about using the right tools and techniques. Whether you’re searching for painters near me or tackling the project yourself, investing in quality materials ensures your cabinets look fresh, modern, and long-lasting. For a truly expert touch, hiring professional painters with cabinet painting experience guarantees exceptional results and a kitchen transformation you’ll love.

Step-by-Step Guide to Painting Your Cabinets Like a Pro
Transforming your kitchen with expert cabinet painting is an affordable and effective way to refresh your space. Professional painters follow a meticulous process to ensure a flawless, long-lasting finish. Here’s how you can achieve professional results with your cabinet painting project.
1. Prep Your Cabinets for Painting
Preparation is key! Skipping this step can lead to peeling or uneven paint. Taking the time to prep your cabinets properly will ensure that your final result looks smooth and professional.
- Remove cabinet doors, drawers, and hardware. Label each piece to make reassembly easier.
- Clean all surfaces with a degreaser to remove oils, grease, and dirt that can interfere with paint adhesion.
- Fill any dents, scratches, or holes with wood filler and sand smooth once dry.
- Sand the surfaces lightly with fine-grit sandpaper (220-grit works well) to help the primer adhere properly.
- Wipe down the cabinets with a microfiber cloth to remove any sanding dust.
- Use painter’s tape to protect walls, countertops, and backsplashes from accidental paint drips.
- Lay down drop cloths to protect floors and surrounding surfaces.
2. Prime for a Long-Lasting Finish
A high-quality primer is a must for cabinet painting! Priming ensures a smooth, even base and helps paint adhere properly for a durable finish.
- Blocks stains and prevents wood from bleeding through paint, especially with oak and other grainy woods.
- Improves adhesion, reducing the risk of chipping or peeling over time.
- Creates a uniform base, allowing the paint color to appear consistent.
- Choose the right primer based on your cabinet material:
- Oil-based primer works well for durability and stain blocking.
- Shellac-based primer is great for blocking stains and sealing wood tannins.
- Bonding primer is ideal for laminate or previously painted cabinets.
3. Apply Paint for a Stunning New Look
Now, it’s time to bring your cabinets to life! Choosing the right paint and application technique is essential for achieving a sleek, professional finish.
- Use high-quality paint designed for cabinets, such as acrylic, alkyd, or oil-based options.
- Apply paint using a high-quality brush and foam roller for smooth application.
- For the best results, consider using a paint sprayer, which delivers a flawless, factory-like finish.
- Apply paint in thin, even coats to avoid drips and brush marks.
- Let each coat dry completely before applying the next.
- Depending on the color, 2-3 coats may be necessary for full coverage and a rich, even appearance.
- Sand lightly between coats with a fine-grit sanding sponge to smooth out any imperfections.
4. Allow Drying & Reassemble Cabinets
Patience is key when drying painted cabinets. Rushing this step can result in smudges or damage to the finish.
- Let the paint cure for at least 24 hours before handling.
- For optimal durability, allow the cabinets to cure for 7-10 days before heavy use.
- Reattach cabinet doors and hardware carefully to avoid chipping the paint.
- Make final touch-ups where necessary to ensure a seamless, polished look.
- Consider adding a protective topcoat for extra durability, especially in high-traffic kitchens.
5. Bonus Tips for Expert Cabinet Painting
- Choose the right finish: Semi-gloss and satin finishes are ideal for kitchen cabinets, as they are durable and easy to clean.
- Work in a well-ventilated area: Proper airflow helps paint dry evenly and reduces fumes.
- Use high-quality materials: Investing in premium brushes, rollers, and paint will ensure professional results.
- Hire professional painters if you want a flawless, hassle-free experience. Searching for “painters near me” can help you find skilled interior painters who specialize in cabinet painting.
By following these steps, you can achieve expert cabinet painting results that will transform your kitchen. Whether you’re tackling the project yourself or hiring professional painters, proper preparation and attention to detail will ensure a stunning, long-lasting finish.
Common Cabinet Painting Mistakes & How to Avoid Them
Painting cabinets is a great way to refresh your kitchen, but even small mistakes can ruin an otherwise perfect paint job. To achieve professional-quality results, it’s essential to be aware of common cabinet painting mistakes and how to avoid them. Whether you’re taking on the project yourself or searching for “painters near me” for expert help, following these tips will ensure a flawless finish.
1. Skipping Prep Work
Proper preparation is the foundation of expert cabinet painting. Neglecting this crucial step can lead to poor paint adhesion, peeling, and an uneven finish.
How to Avoid It:
- Always clean cabinets thoroughly with a degreaser to remove built-up grease, dirt, and grime.
- Sand the surfaces lightly to create texture for better paint adhesion.
- Remove cabinet doors, drawers, and hardware before painting for a smooth and professional finish.
- Use painter’s tape to protect walls, countertops, and backsplashes.
2. Using the Wrong Paint
Not all paints are made for cabinets! Choosing the wrong type of paint can result in a finish that chips easily or doesn’t hold up to daily use.
How to Avoid It:
- Use high-quality acrylic, alkyd, or oil-based paint designed specifically for cabinets.
- Choose a durable finish like semi-gloss or satin for easy cleaning and long-lasting results.
- Apply a bonding primer before painting, especially for laminate or previously painted cabinets, to ensure maximum adhesion.
3. Applying Thick Coats
Applying paint too thickly can cause drips, streaks, and an uneven texture. It also takes longer to dry, increasing the risk of smudging.
How to Avoid It:
- Apply multiple thin coats instead of one thick coat.
- Use a high-quality brush for detailed areas and a foam roller or paint sprayer for smooth surfaces.
- Allow each coat to dry completely before applying the next layer.
- Lightly sand between coats to eliminate any imperfections.
4. Not Allowing Enough Drying Time
Handling cabinets too soon can lead to smudges, fingerprints, and damage to the fresh paint. Paint that hasn’t fully cured is more prone to chipping and scratches.
How to Avoid It:
- Follow the manufacturer’s recommended drying time between coats.
- Let cabinets dry for at least 24 hours before handling.
- For maximum durability, allow the paint to cure for 7-10 days before heavy use.
- Store painted cabinet doors in a dust-free area while drying to prevent debris from sticking to the finish.
5. Skipping the Primer
Primer is essential for ensuring proper adhesion and a smooth, long-lasting finish. Skipping this step can lead to paint peeling, uneven coverage, and stains bleeding through the paint.
How to Avoid It:
- Always use a high-quality bonding primer before applying paint.
- Choose a primer that blocks stains and seals wood tannins to prevent discoloration.
- Apply primer in thin, even coats and let it dry completely before painting.
6. Ignoring the Importance of a Topcoat
While some cabinet paints have built-in durability, adding a topcoat can provide extra protection against scratches, moisture, and everyday wear and tear.
How to Avoid It:
- Apply a clear polyurethane or water-based topcoat for added durability.
- Use a satin or semi-gloss topcoat for an easy-to-clean surface.
- Allow the paint to cure fully before applying a topcoat to prevent smudging.
7. Painting Over Dirty or Greasy Surfaces
Kitchens are prone to grease buildup, and painting over dirty cabinets can lead to poor adhesion and a rough texture.
How to Avoid It:
- Clean cabinets thoroughly with a degreaser before sanding and priming.
- Wipe surfaces with a microfiber cloth to ensure all residue is removed.
- Avoid using oil-based cleaners, as they can interfere with paint adhesion.
8. Not Removing Hardware
Painting around cabinet handles, hinges, and knobs may seem like a time-saver, but it often results in an unprofessional appearance.
How to Avoid It:
- Remove all cabinet hardware before painting.
- Store hardware in labeled bags for easy reassembly.
- If replacing hardware, fill old screw holes with wood filler before painting for a seamless look.
9. Choosing the Wrong Finish
The wrong finish can make cabinets harder to clean and may not hold up to daily use.
How to Avoid It:
- Use a satin, semi-gloss, or gloss finish for cabinets, as they are durable and easy to clean.
- Avoid matte finishes, as they can absorb stains and are harder to maintain.
10. Rushing the Process
Cabinet painting requires patience. Rushing the job can lead to streaks, uneven coverage, and a finish that doesn’t last.
How to Avoid It:
- Set aside enough time to complete each step properly.
- Follow drying and curing times to ensure a durable finish.
- If you want flawless results without the hassle, consider hiring professional painters with cabinet painting experience.
Avoiding these common mistakes can make the difference between a DIY disaster and a beautifully finished kitchen. Whether you’re handling the project yourself or searching for expert cabinet painting services, taking the time to do it right will ensure a long-lasting and professional-quality result.
Why Professional Cabinet Painting Is the Better Choice
While DIY cabinet painting may seem like a cost-saving option, hiring professional painters like That 1 Painter Fort Worth guarantees superior results and a stress-free experience. Here’s why choosing experts is the best decision for your home.
Why Professional Cabinet Painting Is the Better Option
- Flawless Finish – Professional painters use advanced techniques, high-quality tools, and expert-level precision to achieve a smooth, even, and streak-free finish that’s difficult to replicate with DIY methods.
- Time-Saving Convenience – A DIY cabinet painting project can take days or even weeks, while professionals complete the job efficiently, allowing you to enjoy your refreshed space much sooner.
- Durability and Long-Lasting Results – Professionals use top-tier paints, primers, and sealants specifically designed for cabinets, ensuring a tough, chip-resistant, and long-lasting finish.
- No Stress or Mess – From sanding and priming to precise application and cleanup, experts handle every step of the process, eliminating the hassle and frustration that comes with DIY painting.
- Expert Color Consultation – Professional painters help you choose the perfect color and finish to complement your kitchen’s style and increase your home’s value.
- Guaranteed Satisfaction – Many professional painting services come with warranties and guarantees, giving you peace of mind that the job will be done right.
While DIY painting is an option for those with experience and time, the benefits of hiring professionals far outweigh the risks. Investing in expert cabinet painting ensures a beautiful, durable, and stress-free transformation for your home.
How to Maintain Your Newly Painted Cabinets
Once your cabinets are beautifully painted, proper maintenance keeps them looking fresh for years.
- Clean with a damp cloth – Avoid harsh chemicals that can damage the finish.
- Use cabinet-friendly cleaners – Mild soap and water work best.
- Be mindful of moisture – Wipe up spills quickly to prevent water damage.
- Handle with care – Avoid slamming doors or using abrasive sponges.

Ready to Transform Your Kitchen? Let That 1 Painter Fort Worth Help!
Your kitchen deserves a stunning new look, and cabinet painting is the perfect way to achieve it. At That 1 Painter Fort Worth, we specialize in professional cabinet refinishing that elevates your space with high-quality, long-lasting finishes. Why spend thousands on new cabinets when a fresh coat of paint can do the trick? Our expert painters handle everything from prep work to the final coat, ensuring a seamless, stress-free experience. Get in touch with us today and let’s give your cabinets the makeover they deserve!